Introduction
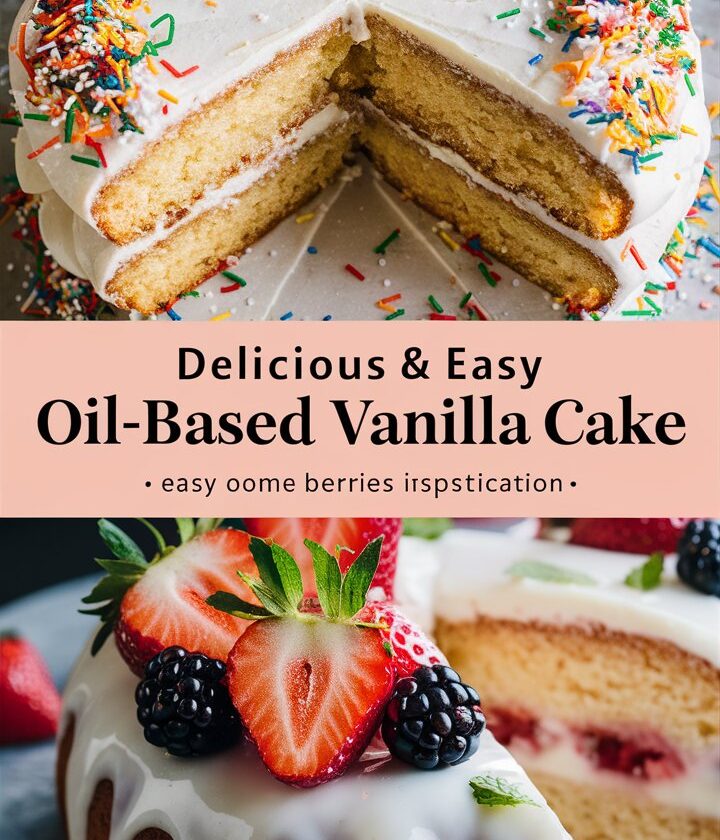
Few desserts are as universally loved as a simple, soft, and fragrant vanilla cake. It’s timeless, versatile, and perfect for nearly every occasion—whether you’re celebrating a birthday, preparing a quick dessert for unexpected guests, or just indulging in a sweet treat on a quiet afternoon.
But what happens when you want to bake a cake and realize you don’t have butter in the kitchen? Or maybe you prefer recipes that feel lighter, easier, and less fussy? That’s where this recipe for easy vanilla cake with oil and no butter comes to the rescue.
This cake is:
- Moist and fluffy – thanks to oil instead of butter.
- Quick and easy – no creaming butter and sugar, just simple whisking.
- Beginner-friendly – anyone can make it with basic pantry ingredients.
- Versatile – it pairs beautifully with all kinds of frostings and toppings.
- Long-lasting – it stays tender and fresh longer than most butter cakes.
By the end of this article, you’ll know not just how to bake this cake but also why the method works so well. You’ll also find variations, storage tips, decorating ideas, and expert answers to the most common questions about oil-based cakes.
Why Choose Oil Instead of Butter?
The most unique feature of this cake is that it uses oil instead of butter. At first, you might wonder if skipping butter will sacrifice flavor or texture. But the truth is, oil often makes cakes even better.
Here’s why:
- Moisture that Lasts
Butter-based cakes sometimes dry out quickly because butter solidifies at cooler temperatures. Oil remains liquid even when chilled, keeping your cake soft and moist for days. - Simpler Mixing Process
Traditional butter cakes require creaming butter and sugar together, which can be time-consuming and requires an electric mixer. With oil, you can whisk the wet ingredients by hand in just a minute or two. - Light and Tender Crumb
Oil coats the flour particles evenly, preventing too much gluten from forming. The result? A tender, fluffy cake with a delicate crumb. - Pure Vanilla Flavor
Since oil is neutral in taste, it allows the warm sweetness of vanilla to shine through without being masked by butter’s richness. - Dairy-Free Friendly
For those who are lactose intolerant or simply want a lighter cake, oil makes this recipe naturally dairy-adaptable. Paired with a plant-based milk, it’s an easy path to a dairy-free dessert.
The Best Oil for Vanilla Cake
Not all oils are created equal when it comes to baking. For the best vanilla cake, you want an oil that doesn’t overpower the flavor of vanilla.
- Canola oil – light, neutral, and one of the most common choices.
- Vegetable oil – affordable, mild, and easy to find.
- Grapeseed oil – slightly more expensive but very neutral in flavor.
- Sunflower oil – another good neutral option.
👉 Avoid oils with strong flavors like olive oil, coconut oil, or sesame oil, unless you specifically want their taste in the cake.
Ingredients for Easy Vanilla Cake with Oil
Here’s everything you’ll need to make this cake:
- All-purpose flour (1 ½ cups) – provides structure.
- Granulated sugar (1 cup) – adds sweetness and tender texture.
- Baking powder (1 ½ teaspoons) – the leavening that makes the cake rise.
- Salt (¼ teaspoon) – enhances flavor.
- Eggs (2 large) – give structure and richness.
- Neutral oil (½ cup) – keeps the cake soft and moist.
- Milk (¾ cup) – binds ingredients and adds tenderness.
- Vanilla extract (1 tablespoon) – gives the cake its classic aroma and flavor.
Optional additions:
- A pinch of nutmeg or cinnamon for warmth.
- A handful of chocolate chips or sprinkles for fun variations.
Step-by-Step Instructions
Step 1: Preheat and Prepare
Preheat your oven to 350°F (175°C). Grease and line an 8×8-inch square pan (or round 8-inch cake pan) with parchment paper. This ensures your cake releases cleanly after baking.
Step 2: Mix Dry Ingredients
In a large bowl, whisk together the flour, sugar, baking powder, and salt. Mixing them first distributes the leavening agent evenly so the cake rises uniformly.
Step 3: Mix Wet Ingredients
In another bowl, whisk the eggs, oil, milk, and vanilla extract until well combined and slightly frothy.
Step 4: Combine Wet and Dry
Gradually add the wet mixture to the dry ingredients, whisking gently until just combined. Avoid overmixing; too much mixing can make the cake dense.
Step 5: Bake
Pour the batter into the prepared pan. Smooth the top with a spatula. Bake for 30–35 minutes, or until a toothpick inserted in the center comes out clean.
Step 6: Cool and Frost
Let the cake cool completely in the pan before frosting. A cooled cake ensures the frosting sets properly without melting.
Frosting and Topping Ideas
This vanilla cake is like a blank canvas—you can pair it with so many frostings. Here are some delicious options:
- Classic Vanilla Buttercream – creamy and sweet, a traditional pairing.
- Whipped Cream Frosting – light and airy, perfect for summer.
- Cream Cheese Frosting – slightly tangy, balances sweetness beautifully.
- Chocolate Ganache – rich and decadent for chocolate lovers.
- Glazed Lemon Icing – a refreshing twist with a citrusy zing.
- Simple Powdered Sugar Dusting – for a lighter, minimalist finish.
Toppings you can add:
- Fresh berries
- Shredded coconut
- Sprinkles
- Edible flowers
- Toasted nuts
Variations of Vanilla Cake with Oil
Once you master this base recipe, you can adapt it in endless ways:
- Vanilla Cupcakes – divide the batter into cupcake liners and bake for 18–20 minutes.
- Layer Cake – double the recipe and bake in two 8-inch round pans for a celebration cake.
- Loaf Cake – bake in a loaf tin for easy slicing.
- Marble Cake – swirl chocolate batter into the vanilla base.
- Funfetti Cake – fold in colorful sprinkles before baking.
- Berry Cake – add fresh blueberries, raspberries, or strawberries.
Storage and Make-Ahead Tips
One of the best things about oil-based cakes is how well they store.
- At Room Temperature – Wrap tightly in plastic wrap or keep in an airtight container for up to 3 days.
- Refrigerated – Keeps for up to 1 week. Bring to room temperature before serving for best texture.
- Freezing – Freeze unfrosted slices for up to 2 months. Wrap each slice individually in plastic wrap and place in a freezer bag. Thaw overnight at room temperature.
👉 If making ahead, bake the cake a day early and frost just before serving for the freshest taste.
Expert Baking Tips
- Always measure flour correctly (spoon into the cup, then level) to avoid a dense cake.
- Don’t skip the salt—it enhances sweetness.
- Check doneness with a toothpick; every oven is slightly different.
- For an extra moist cake, brush cooled layers with simple syrup before frosting.
- Use room-temperature eggs and milk for better mixing.
Frequently Asked Questions (FAQs)
1. Can I make this cake vegan?
Yes! Replace eggs with flax eggs or a commercial egg replacer, and use almond, oat, or soy milk. Ensure sugar and frosting are vegan-friendly.
2. Can I double this recipe?
Absolutely. Bake in a 9×13-inch pan, increasing the baking time slightly.
3. Why use oil instead of butter?
Oil gives the cake lasting moisture, a lighter crumb, and makes the recipe easier for beginners.
4. What frosting goes best with this cake?
Classic vanilla or cream cheese frosting works beautifully, but chocolate ganache or whipped cream are also excellent.
5. Can I add mix-ins?
Yes—try chocolate chips, berries, sprinkles, or shredded coconut.
6. How do I prevent the cake from sinking?
Avoid overmixing, measure ingredients accurately, and don’t open the oven door too early.
Nutrition (per slice, based on 9 slices, unfrosted)
- Calories: ~240
- Carbohydrates: 33g
- Fat: 10g
- Protein: 3g
- Sugar: 18g
Final Thoughts
This easy vanilla cake with oil and no butter proves that simplicity and flavor can go hand in hand. The moist, fluffy crumb makes it irresistible, while the straightforward method ensures even beginners can achieve bakery-quality results. Whether you serve it plain with powdered sugar, top it with fluffy frosting, or dress it up with fresh fruit, this cake is a true all-rounder