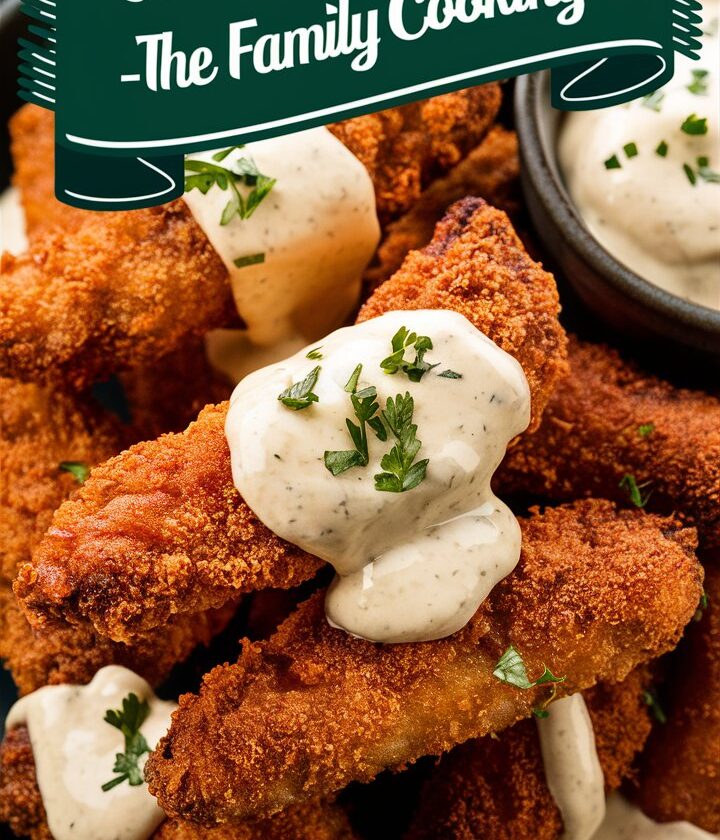
If you’ve ever wished for a way to enjoy the delicious crunch of fried chicken without the mess or extra oil, you’ve found your answer. These Crispy Oven Baked Chicken Tenders deliver the same irresistible flavor and texture you love — perfectly golden on the outside, tender and juicy on the inside — but with a lighter, oven-baked approach.
This is the kind of recipe that wins over everyone at the table. From kids who love dunking crispy strips in ketchup to adults who crave a wholesome comfort meal, these tenders hit all the right notes. They’re quick to make, bursting with flavor, and wonderfully versatile.
Whether you’re serving them for dinner, adding them to salads, or preparing a platter for guests, these baked chicken tenders are sure to impress. Let’s explore how to make the most flavorful, crunchy, and juicy oven-baked chicken tenders you’ve ever tasted.
Why You’ll Love This Recipe

There are plenty of reasons this recipe stands out from the rest:
- Crispy yet oil-free: You’ll get that fried-chicken crunch without using a deep fryer.
- Healthier comfort food: Lower in fat but high in satisfaction — it’s a guilt-free pleasure.
- Quick and easy: Ready in under 40 minutes from start to finish.
- Kid-friendly: Tender, juicy chicken wrapped in a golden coating that kids adore.
- Perfect for any occasion: Serve for family dinners, meal prep, or even at parties.
Ingredients You’ll Need
Here’s everything required to make these crispy oven baked chicken tenders. Each ingredient plays a key role in building flavor and achieving that satisfying crunch.
Chicken and Marinade
- 1½ pounds (700 g) chicken tenders or boneless chicken breasts
Slice into even strips for uniform cooking. - 1 cup buttermilk
Tenderizes the meat and adds subtle tang. - ½ teaspoon salt
- ½ teaspoon black pepper
For the Coating
- 1 cup panko breadcrumbs – creates light, airy crispness.
- 1 cup crushed cornflakes – adds golden crunch and color.
- ½ cup grated Parmesan cheese – introduces nutty, savory depth.
- ½ cup all-purpose flour – helps the coating adhere.
- 2 large eggs, beaten – binds the crumbs.
- 1 teaspoon paprika – for a hint of smokiness.
- 1 teaspoon garlic powder – infuses mild savory flavor.
- ½ teaspoon dried thyme or oregano – adds herbal aroma.
- Salt and pepper, to taste.
- Olive oil or cooking spray – helps crisp the coating during baking.
Step-by-Step Instructions
Step 1: Prepare the Chicken
Trim any excess fat from the chicken tenders. Rinse briefly and pat completely dry.
Dry chicken helps the breading cling better and bake up crispier.
Step 2: Marinate in Buttermilk
In a bowl, combine buttermilk, salt, and pepper. Submerge the chicken pieces, ensuring they’re fully coated.
Refrigerate for 30 minutes to 8 hours.
Tip: Buttermilk’s mild acidity softens the chicken’s fibers, producing a tender interior while maintaining moisture.
Step 3: Create the Breading Station
Set up three shallow bowls:
- Bowl 1: Flour seasoned with salt and pepper.
- Bowl 2: Beaten eggs.
- Bowl 3: A mixture of panko breadcrumbs, crushed cornflakes, Parmesan cheese, paprika, and dried herbs.
This setup makes coating faster and cleaner.
Step 4: Coat the Chicken
Remove the chicken from the buttermilk, allowing the excess liquid to drip off.
- Dredge in the seasoned flour to create a dry base.
- Dip into the beaten eggs for stickiness.
- Roll thoroughly in the breadcrumb-cornflake mix, pressing lightly to adhere.
Lay coated tenders on a wire rack placed over a parchment-lined baking tray.
The rack ensures hot air circulates evenly underneath, helping both sides become crispy.
Step 5: Bake to Golden Perfection
Preheat the oven to 425°F (220°C).
Lightly spray the chicken with cooking spray or drizzle a bit of olive oil on top.
Bake for 20–25 minutes, flipping once halfway through, until golden brown and cooked through.
The internal temperature should reach 165°F (74°C).
Pro Tip: For an extra-crisp finish, turn on the oven’s broiler for the final 2–3 minutes — but keep an eye on it to avoid over-browning.
Step 6: Serve and Enjoy
Let the tenders rest for 2–3 minutes before serving. This brief resting time allows juices to redistribute for maximum tenderness.
Serve warm with dipping sauces like ranch, honey mustard, or BBQ sauce. Each bite will deliver juicy chicken wrapped in a perfectly crisp shell.
Serving Suggestions
Chicken tenders are endlessly versatile. Try pairing them with:
- Classic Sides: Homemade fries, mashed potatoes, or coleslaw.
- Healthy Pairings: Roasted vegetables, green beans, or a fresh garden salad.
- Snack Platters: Arrange with multiple sauces for game-day spreads.
- Wraps and Sandwiches: Slice and layer inside tortillas or burger buns with lettuce and sauce for a satisfying meal.
Homemade Dipping Sauces
Make your own dipping sauces for added flavor variety:
1. Honey Mustard Sauce
- 3 tbsp mayonnaise
- 1 tbsp yellow mustard
- 1 tbsp honey
- A squeeze of lemon juice
2. Spicy Sriracha Mayo
- 3 tbsp mayonnaise
- 1 tsp sriracha
- A dash of lime juice
3. Garlic Ranch Dip
- ¼ cup ranch dressing
- ½ tsp garlic powder
- Fresh parsley for garnish
These simple dips balance the crisp chicken with creamy or spicy notes, creating the perfect flavor contrast.
Storage and Reheating
Storing Leftovers
Allow the chicken tenders to cool completely. Place them in an airtight container and refrigerate for up to 3 days.
Freezing
You can also freeze them before or after baking.
- Before baking: Place coated raw tenders on a tray, freeze until firm, then transfer to freezer bags.
- After baking: Freeze cooled cooked tenders.
They’ll last up to 2 months.
Reheating
- Air Fryer or Toaster Oven: Reheat at 375°F (190°C) for 5–7 minutes for crisp results.
- Conventional Oven: Bake at 400°F (200°C) for about 10 minutes.
- Avoid Microwave: It softens the coating and reduces crunch.
Tips for Extra-Crispy Results

- Use a wire rack: Elevates the chicken so heat can reach every surface evenly.
- Don’t overcrowd: Give each tender space to bake properly.
- Double coat for crunch: For ultra-crispy results, dip again in egg and crumbs before baking.
- Use crushed cornflakes: Adds a satisfying golden crackle.
- Add a touch of oil: A light spray promotes deep, even browning.
- Bake at high temperature: The heat locks in moisture while crisping the coating.
Air Fryer Variation
You can easily make this recipe in an air fryer:
- Preheat air fryer to 400°F (200°C).
- Arrange tenders in a single layer.
- Spray lightly with cooking oil.
- Cook for 10–12 minutes, flipping halfway through.
They’ll turn out beautifully crisp and golden — and even faster than in the oven.
Healthier Ingredient Swaps
Want to make these even lighter? Try these adjustments:
- Replace flour with whole-wheat flour or almond flour for added nutrition.
- Use low-fat buttermilk or plain Greek yogurt for marinating.
- Substitute part of the breadcrumbs with ground oats for extra fiber.
- Bake on parchment paper if you don’t have a rack, flipping halfway.
These swaps keep the meal wholesome while maintaining amazing flavor and crunch.
Meal Prep and Make-Ahead Instructions
These chicken tenders are ideal for meal prep:
- Refrigerate uncooked breaded tenders: Up to 24 hours before baking.
- Freeze raw tenders: Up to 2 months.
- Reheat cooked tenders: In an air fryer or oven for a few minutes.
Having them ready to go makes weekday meals effortless.
Common Mistakes to Avoid
- Skipping the buttermilk soak: The chicken may end up tough and dry.
- Using too much oil: A light spray is all you need for crispness.
- Crowding the pan: Causes steam and prevents proper browning.
- Uneven sizes: Try to cut strips evenly to ensure they cook uniformly.
- Overbaking: Monitor internal temperature; remove immediately at 165°F (74°C).
How to Make It Gluten-Free
For a gluten-free version:
- Use gluten-free all-purpose flour.
- Choose gluten-free panko or crushed rice cereal instead of breadcrumbs and cornflakes.
Everything else remains exactly the same — the result is just as crispy and delicious.
Nutritional Information (Per Serving)
| Nutrient | Amount |
|---|---|
| Calories | 310 kcal |
| Protein | 29 g |
| Fat | 10 g |
| Carbohydrates | 22 g |
| Fiber | 1 g |
| Sodium | 530 mg |
| Sugar | 1 g |
(Estimated values; actual results may vary depending on ingredient brands and portion sizes.)
FAQs – Crispy Oven Baked Chicken Tenders
1. Can I make these tenders ahead of time?
Yes! Bread the chicken, cover, and refrigerate for up to a day before baking.
2. What can I use if I don’t have buttermilk?
Combine 1 cup of milk with 1 tablespoon of lemon juice or vinegar. Let it sit for 5 minutes and use as a substitute.
3. How do I keep chicken tenders crispy after baking?
Cool on a wire rack — not a plate — so air circulates beneath and prevents sogginess.
4. Can I use chicken thighs instead of tenders?
Definitely. Boneless, skinless thighs work well; just extend cooking time slightly.
5. How long will baked chicken tenders last?
Up to 3 days in the refrigerator or 2 months in the freezer when stored properly.
6. Can I make these dairy-free?
Yes. Use a dairy-free milk alternative with a tablespoon of vinegar instead of buttermilk and skip the Parmesan or use a vegan substitute.
Flavor Variations
If you like experimenting, try these flavor twists:
- Spicy Cajun: Add 1 teaspoon Cajun seasoning to the coating mix.
- Italian Herb: Include oregano, basil, and a sprinkle of mozzarella.
- Lemon Pepper: Mix in lemon zest and cracked pepper for a bright, tangy version.
- Smoky BBQ: Add a spoon of BBQ spice mix or smoked paprika for bold flavor.
Each variation brings its own unique twist to the basic recipe.
Why This Recipe Works
This recipe is built on three principles: marinate, coat, and bake hot.
- The buttermilk marinade ensures every piece stays moist and flavorful.
- The panko-cornflake coating provides that signature crispiness.
- The high-temperature bake seals in juiciness while producing a perfect golden crust.
Unlike fried versions, these tenders remain light and never greasy. The flavors are clean, satisfying, and perfectly balanced.
Serving Pairing Ideas
1. For Family Dinners
Serve with mashed potatoes and steamed green beans.
Add a drizzle of gravy or honey mustard for the ultimate comfort meal.
2. For Kids
Pair with macaroni and cheese or oven fries.
Let them dip in ketchup, ranch, or cheese sauce.
3. For Healthy Eaters
Serve on top of quinoa salad or with roasted veggies and yogurt sauce.
4. For Parties
Arrange on a platter with multiple dips — ranch, BBQ, and spicy mayo.
Sprinkle chopped parsley or green onions for garnish.
Chef’s Secrets for Professional Results
- Room-temperature chicken: Avoid baking chilled meat; it cooks unevenly.
- Rest the coating: After breading, let tenders sit for 10 minutes before baking; this helps crumbs stick better.
- Use freshly grated Parmesan: It melts slightly, binding crumbs and deepening flavor.
- Flip carefully: Use tongs to avoid breaking the crust.
- Add a pinch of sugar to coating: Promotes deeper golden color.
These small touches transform homemade chicken tenders into a dish that tastes like it came from a restaurant kitchen.
Storage Summary
| Storage Method | Temperature | Duration | Notes |
|---|---|---|---|
| Refrigerator | 40°F / 4°C | 3 days | Keep in airtight container |
| Freezer (Raw) | 0°F / -18°C | 2 months | Freeze on tray first |
| Freezer (Cooked) | 0°F / -18°C | 2 months | Reheat in oven or air fryer |
| Reheat (Oven) | 400°F / 200°C | 10 mins | Rest 2 mins before serving |
Environmental and Health Benefits of Baking
Baking instead of frying isn’t just better for you — it’s better for your kitchen and the planet:
- Less oil waste: No leftover frying oil to dispose of.
- Cleaner cooking: No splatter or greasy residue.
- Lower calories: Baked chicken tends to have 40–60% fewer calories than fried versions.
- Heart-friendly: Reduced trans fats and cholesterol intake.
It’s a healthier and more sustainable way to enjoy classic comfort food.
Expert Insight: Perfect Texture Science

Crispiness is all about moisture control. When baked at a high temperature, the moisture inside the chicken turns to steam, which softens the meat while the outer coating hardens. The panko and cornflakes act as micro-barriers, keeping moisture in and oil out — creating that distinct crunch.
Meanwhile, the Parmesan melts slightly, binding the crumbs and providing umami depth. The result is a delicate contrast between a shatteringly crisp crust and a tender, flavorful interior.
Nutritional Benefits
- High Protein: Great source of lean protein for muscle maintenance.
- Low in Fat: Baking minimizes oil absorption.
- Balanced Meal: Pair with vegetables for fiber and vitamins.
- Kid-Approved: A healthy twist on a classic favorite.
Conclusion
These Crispy Oven Baked Chicken Tenders prove that you don’t need a deep fryer to achieve mouth-watering crunch. With simple ingredients, quick preparation, and wholesome results, they’re a recipe worth repeating.
Every bite offers a satisfying combination of texture and taste — golden, crisp coating followed by juicy, tender chicken. Perfect for busy weeknights, family gatherings, or meal prep, these tenders are guaranteed to please everyone